expr:class='"loading" + data:blog.mobileClass'>
Showing posts with label sewing. Show all posts

8.18.2016

DIY Crush Guest Host

Hello! And welcome to a new DIY Crush link up party! I'm so excited to be hosting this week's link up on my blog. I'm glad you have visited me here in my corner of the blogosphere. While your here, check out my tutorials and freebies page for some great ideas and inspiration. And don't forget to check out my very first sewing pattern that I released earlier this year. (It's on sale for half off right now until August 31, 2016. Use code BACK2SCHOOL2016 in my Etsy shop.) Thanks for visiting! 
Follow me here: Pinterest // Facebook // Instagram // Etsy shop // Blog // Newsletter


 And if you haven't signed up for my email newsletter, now is the time to do that!


Here are the favorites chosen from last week's party. I hope you had a chance to see them. If not, see last week HERE.

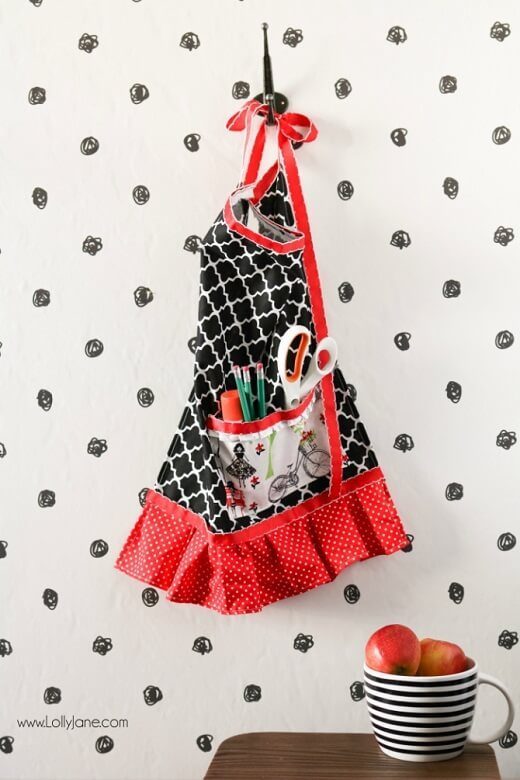
Domenica picked this Easy Half Apron Tutorial from Lolly Jane, a blog full of amazing DIY and decoration ideas! I love the fabric chosen and that pocket would be so perfect for holding a few things that you need to keep close during a project.
  Easy-DIY-Half-Apron-8(pp_w670_h1005)
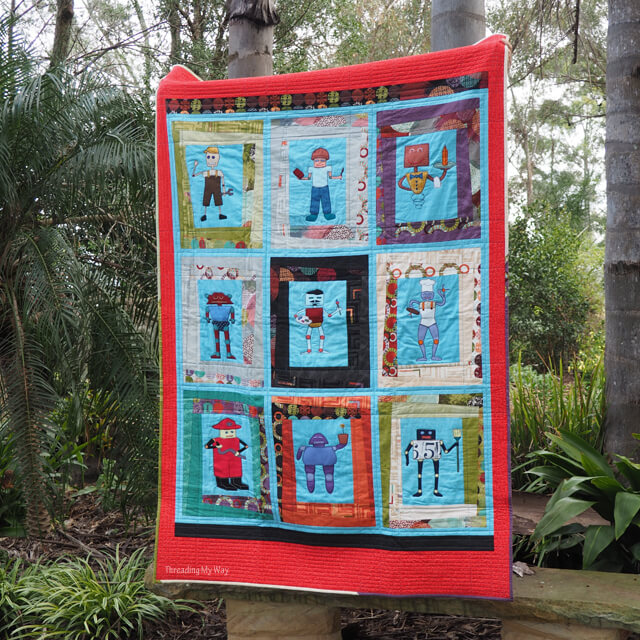
Marsha picked this amazing Robo Quilt by Threading My Way. All of the drawing of the robots are from her son. She is also providing templates for download so you too can make a stunning quilt for a special little (or big) boy for Christmas! robot_quilt_free_appliques
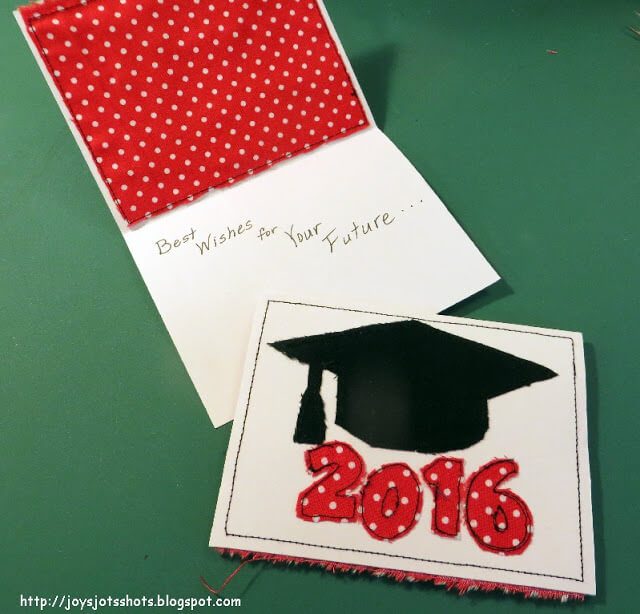
My favorite post from last week is this Paper Guided Stitched Graduation Card from Joy's Jots, Shots & Whatnots. This is a great project to use up scrap fabrics as well! I'm sure the card maker in my family would love to use this idea in the future. I just have to be willing to give her a bit of sewing time on my own sewing machine!38


Meet your hosts!
Last week we had a lovely guest host, Annalee from The Salt Water Blog!
The Salt Water Wife

You can follow her here: facebook // instagram // pinterest


Our co-host, Marsha, from Seam Of My Pants will sadly be taking a break from partying with us, but hopefully she'll return soon! Farewell, Marsha!

Seam of my pants. Guest host at DIY Crush


Our permanent co-host is Domenica from Easy Sewing For Beginners, a blog full of tutorials, projects and videos!

Easy Sewing For Beginners | DIY Crush

Please follow your hosts:
DIY Crushblog // facebook //twitter // pinterest // youtube // google+ // instagram
Easy Sewing For Beginnersblog // facebook // twitter // pinterest // youtube // instagram
Seam Of My Pantsblog // facebook page //twitter // pinterest // facebook group // instagram

♥ ♥ ♥ ♥ ♥ ♥
We will pin every instructional post but won't be able to comment on every post. However, if you are one of our favorites, we will comment to let you know!
♥ ♥ ♥ ♥ ♥ ♥

To give you extra exposure, we pin every instructional post you are linking up to this board! Come and follow us on Pinterest!

Please play by our rules :)
Kindly install this image into your site & link to www.diy-crush.com:
DIY Crush Link Party Button
(or you can just link to DIY Crush with a text link)
>> To make sure you are playing by my new "rule" I'll check your site before we pin <<

We would love for you to spread the word about this party!! We want everyone to join!

Ready to party now?? We sure are! Let's see what you have been up to lately! It's time to show off!

What Can You Show Off?

  • free craft tutorials & patterns
  • pattern reviews (can include links to the pattern for purchase)
  • decoration with small list of how you did it
  • recipes for foods that are also kids friendly (no alcoholic recipes please)
  • business/blogging tips
  • money tips for SAHM’s and WAHM’s

What CAN’T You Show Off?

  • shops
  • giveaways
  • spam sites
  • products for sale
  • adult content
///By linking up you are giving us permission to visit your blog, pin/share images from linked up post and link back to you///

6.20.2016

Summer of Sewing--Project Organization

One thing that I like to do is cut out several projects at one time. Because sometimes I'm in the mood to sew, but I don't want to spend the time gathering the fabric, deciding on accent fabrics, coordinating zippers, buttons, and snaps. So in order to remedy that, I cut out several projects in one session and keep them by my sewing machine to be ready to sew.
I'm sure there are lots of really great and elaborate ways to organize your sewing projects, but I'm aiming for simplicity here. Also I like to use what I have on hand. I was also getting ready to go out of town and considered taking my sewing machine and projects with me. Since I knew I wouldn't have all of my sewing supplies with me, I wanted to be sure that I would have everything needed to finish each project that I took with me.


After I cut out each project, I stored the pattern pieces and the fabric that I had cut into a gallon size zip top bag. Since these are digital sewing patterns, I made sure that each pattern was loaded on my iPad so I would have access to the sewing instructions as well. I also added notions to the bags that would be needed to finish each project--buttons, snaps, snap tool, elastic, interfacing, etc. 
As I was packing up my sewing machine, I made sure that I also packed coordinating thread for each project and extra bobbins and needles. Sure there would probably be a local shop nearby to purchase anything that I had forgotten, but my goal was to be totally prepared and not need to waste precious sewing time by needing to find a local shop.
(This post contains affiliate links. When you purchase through my affiliate links, I earn a small commission at no extra cost to you. Thank you for supporting my site.)
These are the projects that I prepped in advance of my trip (many of these patterns can be purchased at UpCraft Club):
I didn't end up taking my sewing machine on my weekend trip. But now I have several projects ready to go, and I can't wait to finish each project. Now I have everything together. The only problem I have now is choosing which project to sew next! What projects do you have on your sewing table?

Follow me on Bloglovin' 
Follow me on Instagram

5.02.2016

Lessons Learned From Sewing

I recently conducted a little experiment with my sewing. It was an accidental experiment, but I learned a very important lesson. Actually I already KNEW this lesson, so I more or less just proved my hypothesis.


When pattern designers create a sewing pattern, they don't all use the same size chart. Each designer uses their own size chart to create their patterns. A size 4 to one designer might very well be the same measurements of a size 3 to another designer. It's always a good idea to take measurements and write them down BEFORE choosing a size to make. For my kids, I typically take their measurements about every 4-6 months. My kids are slowing down in their growing, but for a baby, you should take measurements more often. 

For this experiment I made 4 different patterns by 4 different designers, BUT I made the same size in each pattern: size 12 months. 

The patterns I used:

4.18.2016

Whip It Up--Kitchen Linens Style


I have a newsletter now. Subscribe so we can stay in touch. It will be fun!  I'll share when I have new patterns and tutorials available.


Ink and Arrow Fabrics in conjunction with Sew Mama Sew graciously provided these absolutely delicious fabrics from the Whip It Up fabric collection. I can only imagine the projects that will be dreamed up with this fabric. My favorite print is the butter yellow with witty sayings on it: perk up; roll with it; be grateful; don't flip out. Also adorable is the cutlery on black or white. 
For this challenge I decided to make a set of four quilt-as-you-go place mats (and I included a tutorial just in case you want to make your own). I love the quilt as you go method. It's so satisfyingly fast and easy, too! I was so excited to receive my fabric in the mail. When it arrived, my kids were just as happy to help me open it. After we all ooohhed and aaaahhed over the yumminess that now belonged to me, I promptly started planning.
I secretly wished that I could just keep this special treat in my stash for a while, you know, to get good and ripe. But I had this challenge, and this idea, that needed to be completed. And anyway, see how much cuter the fabrics are when they are used with dishes? MUCH better than simply aging in my stash.
I made each place mat have a different backing. A genius little idea I thought of before I even made them. No arguments over whose place mat is whose!
I adore the colors in these fabrics too. Plenty of cheerfulness to go around and several good staples. For the binding I chose the square dot blender in black from the Pixies line. I love all of those Pixies blenders and think they would make great coordinating prints with lots of different fabrics when you just want a little something more than a solid, but don't quite want to go full polka dot. Cute stuff! For the rest of the prints I chose from the Whip It Up collection: yellow kitchen items and phrases, white eating utensils, aqua salt and pepper shakers, and orange salt and pepper shakers. All of the prints are adorable, and I love how kitchen themed they are with just the right amount of whimsical touch added. So cute!
Materials Needed to make one place mat: (I was able to make 4 placemats with 1/2 yard cuts from each of 5 fabrics.)

3.28.2016

Bubblegum Anyone?

Believe it or not, I have had this pattern for well over two years! I just love the look of the dress and have been meaning to sew it long before I actually got around to it. But the perfect opportunity and fabric combination finally pushed me to sew it up!

I made this dress in a size 12 month for my niece. It fits well on the width but I'm afraid it may be too long for her if she crawls around in it. But I'm sure she will be walking very soon, so not really an issue!

3.22.2016

It's A Pajama Party!

For the PJ party, I sewed the All You Need Jammies by Heidi and Finn. I have always enjoyed patterns written by Heidi and Finn. These jammies are truly the only pajama pattern you will ever need. The pattern ranges in size from 12 months through 12 year. Included in this pattern is 2 different styles of pants, which can also be made as shorts. Also included is 2 different styles of shirts, including short or long sleeves. A nightgown style is also included. See what I mean? You don't need a single other PJ pattern for quite a few years. 
In fact all of the pieces could be considered wardrobe staples: leggings and all the t-shirts your child could possibly need. Mix up the fabric choices and this easily becomes the most versatile pattern around.

3.07.2016

How To Shorten A Pattern--Free Tutorial

When I recently made a hoodie for myself, according to the finished measurements given, the hoodie would sit halfway down my thighs. I didn't want the over-sized look, so I needed to shorten my bodice pieces. I could have just hacked a couple of inches off the bottom of the finished hoodie (and honestly that's probably what I would have done in the past), but then I would lose the shaping effect of the princess seams and the finished hoodie would look just odd. 

Here's a quick and easy method for shortening a pattern. I use this same method when shortening sleeves or pants as well.

3.02.2016

Handicrafts, Projects, and Resources For Creative Kids

Do you have artistic and crafty children? Many children have a natural desire to create. I know mine do. I always try to keep a generous supply of craft materials around the house so they can use them when they want to. Over the years, our selection has changed as interests have changed and children have grown. We've moved from stickers and pom poms to needle and thread, calligraphy, scrap booking, and photography. My son (and my daughters too for that matter) really enjoy building and creating things with LEGO bricks. Creativity comes in many forms, not just art. I've realized over the years that my kids learn something much easier when I attach a creative goal to their learning. They would much rather draw and doodle than write a 5 paragraph essay. There is definitely a time and a place for writing that essay, but sometimes it's just much more fun to learn when there is a creative aspect involved. I have compiled here a list of my favorite resources and even some projects for creative kids of all ages.

2.22.2016

Ruffle Pants--Aivilo Charlotte

Aivilo Charlotte is one of my favorite pattern designers. In fact, hers is one of the first pdf patterns I ever sewed when I first started sewing, and when pdf patterns were just making their appearance in the sewing world. My friend and I made that pattern numerous times just because it was so much fun to make! (special coupon code just for my readers at the end of the post)
A couple years ago, I sewed this pattern for my one of my daughters. Well, I dug out the ruffle pants pattern again and made a size 12 months for my darling niece. They are just a tad big, but adorable nonetheless! 

2.12.2016

Jocole Love

I recently sewed this adorable version of the Everyday Princess top from Jocole patterns. It really is such a lovely sew. I like the look that shirring adds to the back of the top as well as making this top not need any closures--it simply stretches to fit over the child's head.

It would be really fun to recreate your child's favorite princess using this pattern. Really your imagination is the limit here. It would be very easy (and fun) to quickly and easily sew a top for each day of the week. The bottom ruffle is optional, and you can choose to bind the sleeves or use elastic to gather them with to a ruffle finish. I opted for a simple version with my own applique added. I also love how the top stitching really completes the look and adds to the professional finish of this project.
I used rolled hems on my ruffles, sleeves, and the back bodice piece that is shirred. Instructions are given for using a simple hem if you do not have the ability to do a rolled hem. The bodice is fully lined which is a lovely way to hide any stitching from the embellishments that you choose to use.
I created my own applique for this top. I cut a heart shape from fabric and appliqued it to the bodice. For the word love, I used single fold bias tape. I folded it in half and stitched it together. Then I shaped the bias tape into the word love and used a glue stick (my favorite sneaky sewing tool) to hold it all in place while I stitched over the word. Any embellishment that you do needs to be done before you construct the rest of the top. 
Instructions are included for creating the shirred panel for the back bodice. Don't let the shirring scare you away from making this top. It really is fun to do. I like to see the elastic shrink right up after a blast of steam from the iron. This also makes the top quick to sew and easy to put on because there are no other closures--no buttons and button holes, no snaps, no zippers.
The puffy sleeves really add to the "princess" look of this top. I used a rolled hem on the edges and then stitched over a length of narrow elastic to gather the sleeves. Instructions are included for creating a gathered bound edge sleeve as well. (I received this pattern for free in order to participate in this blog tour. I wasn't required to write a positive blog post about it, nor was I required to share about the pattern on social media. I only share with my readers those products and services that I love.)


Follow me on Bloglovin'
Follow me on Instagram

Be sure to check out all of the blogs on this tour! Which is your favorite so far?
 Feb 8- Larissa from Connected By a Thread 
 Feb 9- Tibeca from Sewing by Ti 
 Feb 10- Robin from My Little Lady & Gentleman 
 Feb 11- Patricia from Sew Far North 
 Feb 12- Linda from Sew Happily Ever After 
 Feb 15- Larissa from Connected by a Thread 
 Feb 16- Amy from Wally and Grace 
 Feb 17- Melissa fron Rebel & Malice and Sharon from Sweetpea & Pumpkins 
 Feb 18- Ula from Lulu & Celeste 
Feb 19- Teronia from Crazy Crafty Haute Mama and Cindy from Cindy Parrett.com


2.08.2016

Valentine Crafts, Sewing Projects and more


Every year Valentine's Day rolls around and every year I have nothing planned. This year I asked around for some ideas and have a lovely round-up of projects to present to you. Consider this as my gift to you this year. Instead of searching for hours to find the perfect recipe or craft for the kids to complete, try one of these suggestions. (Affiliate links in this post are marked as such with an *. If you purchase an item using one of my affiliate links, I receive a small portion of the sale at no additional cost to you. Thank you for supporting my blog and family!)

12.28.2015

Molly Cardigan--Liola Patterns

go to patterns
This month I sewed something new for ME! I rarely sew for myself. I actually think there a couple reasons for that:

1. There are always more fun and interesting projects demanding my time and attention.

  • Sewing for kids is always much more fun and interesting--at least to me.
  • Plus I don't really like to see myself in photographs. Even though I have lost a considerable amount of weight, I'm still not 100% comfortable in front of the camera.

2. It takes more thought and adjustments to make a pattern to fit my size.

  • I'm short--barely 5'1" and so I almost always have to chop several inches off the length of skirts or pants.
  • I also have short arms--thus I have to chop off a couple inches in the sleeve area.
  • I have never done a full bust adjustment so that pretty much rules out tops for me to sew--cardigans are a different story.

12.21.2015

Caroline Party Dress + Tutorial


I recently sewed not one, but two, Caroline Party Dresses by Mouse House Creations. I've been wanting to sew this darling dress for awhile now, and finally was able to get to work on it. The finish on this dress is gorgeous. It's a fully lined dress with options for lining the bodice only, adding tulle peeking out of the bottom, and pockets. I opted for the fully lined dress, leaving off the tulle and the pockets (babies don't need pockets, right?). Step-by-step photo instructions are included with excellent instructions for inserting an invisible zipper, which just so happens to be my favorite kind of zipper to install. (I purchased this pattern some time ago and have had it in my pattern stash waiting for the perfect fabric to use with it. Throughout this post I have used some affiliate links and appreciate when my readers purchase patterns through my affiliate links, I receive a small portion of the sale, which helps support my sewing and my blog efforts. Thanks!)

12.15.2015

7 Gifts for the Sewing Enthusiast

Do you need to purchase a gift for a sewer in your life? I've compiled here a list of my favorite sewing related items that would be perfect for that last minute sewing gift.(Some links are affiliate links and will be marked as such with an *)


1. Windy-city Bags: 12 Handbags and Totes Sewn With Structure and Style* by Sara Lawson. This book was just released on December 1. It's sure to be on the top of the wish list for any bag maker. 


2. Membership to UpCraft Club*. This is truly the gift that keeps on giving. Each month the member can choose a pattern for free in addition to 20% off all other purchases throughout the year.


3. Swoon Vintage Pattern* Collection. 10 patterns in the collection so far. This will keep them busy for hours! There is also the favorites collection, but the patterns in the vintage collection are the newest ones. Gift cards are always appropriate too. 


4. Brother 2340CV Cover Stitch*--Ok. I realize that by putting this on here, I could be treading on treacherous ground. A coverstitch machine is really hard to buy online without really getting a good feel for it--however I have heard great things about this machine. I also suggest shopping at your local sewing machine dealer to get a glimpse at the newest models available.


Click here to visit One Thimble5. Subscription to One Thimble Sewing Magazine*--another gift that keeps on giving. Four times per year, receive the latest news and projects in a digital e-zine format. What's not to love about that?


6. Gift card to their favorite fabric store. This one might be a little bit harder to obtain without them knowing. You will have to really go undercover to find out their favorite shopping places. I consider myself lucky to live reasonably close to a few boutique fabric shops--consider shopping at The French Seam or Always in Stitches if you are in the Indianapolis area.

7. Dinner out--So this one is totally not sewing related, but everyone loves to not have to cook dinner and clean it up--leaves more time for sewing. Am I right? 


Follow me on Bloglovin'
Like Sew Happily Ever After on Facebook
Follow me on Instagram

This post may contain affiliate links. By using my affiliate links, I earn a small commission which helps me continue sewing cool stuff for my family. I would never recommend something that I wouldn't be interested in. I was given a copy of this pattern at no cost to me in exchange for an honest review on my blog. Thank you for supporting my site!

12.04.2015

Merry Modkid Christmas + Giveaway


With Christmas just around the corner, it's always a good time to stock up on handmade gifts. The Metro Clutch by Modkid is an excellent pattern to have on hand. Not only does it sew up fairly quickly, but it also uses very little fabric and no specialty hardware other than a magnetic clasp, which are pretty common and easy to find. I was able to sew these three clutches up in one sewing session. By the time I got to the third one, I was able to put it together in probably 20 minutes. So this would be perfect for a last minute gift or a gift that you could make several of to have on hand just in case. They are the perfect size to fill with a few extra goodies to make the gift extra special.

12.01.2015

A Crafting Tote

For my stop on the Radiant Home birthday celebration, I sewed the water bottle tote. This is a really cute and functional tote that will easily hold 6 large water bottles. 

I decided to not put the carrying handles on the tote and have instead made it into a crafting tote. There is plenty of room to hold lots of supplies and keep your space organized. 
 
I chose to leave the front pocket on the bag. Since the original instructions use the strap webbing to hide the raw edges of the pocket, I had to make a couple minor adjustments. First, to take care of the raw edges of the pocket sides, I simply cut out a piece of lining fabric the same size as the pocket piece. I sewed both pocket rectangles right sides together leaving a space for turning. Once the piece was turned, I top-stitched across the top of the pocket and attached it to the outside as instructed in the pattern. Since the pocket piece runs all the way across the font, bottom, and back of the tote, I also put a line of stitching about 6 inches down from the top of the pocket piece so I wouldn't lose any of my crafting supplies.
I also tried my hand at free motion applique (fma). I have been an applique fan since the very beginning of my sewing hobby, but this was the first time I had ever tried FMA. I purchased a free motion quilting foot at my local sewing machine dealer, attached it to my machine, and then sewed around the letters in the word create, which I also attached to the front pocket. I actually found that I enjoyed the process of FMA and like how the stitching looks a little like sketching. It was challenging at first for my hands (and my brain) to coordinate moving the fabric along with adjusting the speed with my foot pedal.


Radiant Home Studio 2nd Birthday Celebration:


Wednesday, Dec. 2nd Sew Very || Swoodson Says || Vicky Myers Creations 
Thursday, Dec. 3rd Happy Okapi || House of Estrela || Molly and Mama 
Friday, Dec. 4th Hugs Are Fun || Sew DIY || Made By Sara 
Saturday, Dec. 5th The Wholesome Mama ||  Rebel and Malice

Follow me on Bloglovin'
Follow me on Instagram

Some posts include affiliate links. When you purchase products by using my links, I earn a portion of the sale, which helps support my sewing and blogging efforts. Thank you for reading my blog!

11.19.2015

A New Look Blog Tour + Giveaway


I'm honored to be participating in the Gracious Threads A New Look Blog Tour (read to the very end for the giveaway). I have been looking forward to sewing the Rainbow Tee and Cirrus Skirt ever since they were released. My challenge was to sew up "a new look" in some way, shape, or form. I chose to sew the garments as suggested with no modifications. But I chose to sew them in camo colors for my girlie here. This is my girl who prefers to wear jeans and a t-shirt, so the new look for her is wearing a skirt and wearing camo. She generally chooses bright colors to wear, which look fantastic on her, but it was time to try something different. She wasn't too thrilled about the fabric choices at first, but once she tried them on, she commented about how comfortable they were and decided that she really did like wearing them. I can imagine this skirt would be super comfy sewn up in some sweatshirt knit and layered with leggings for the winter.